AI CHARACTERS · HOW-TO GUIDE
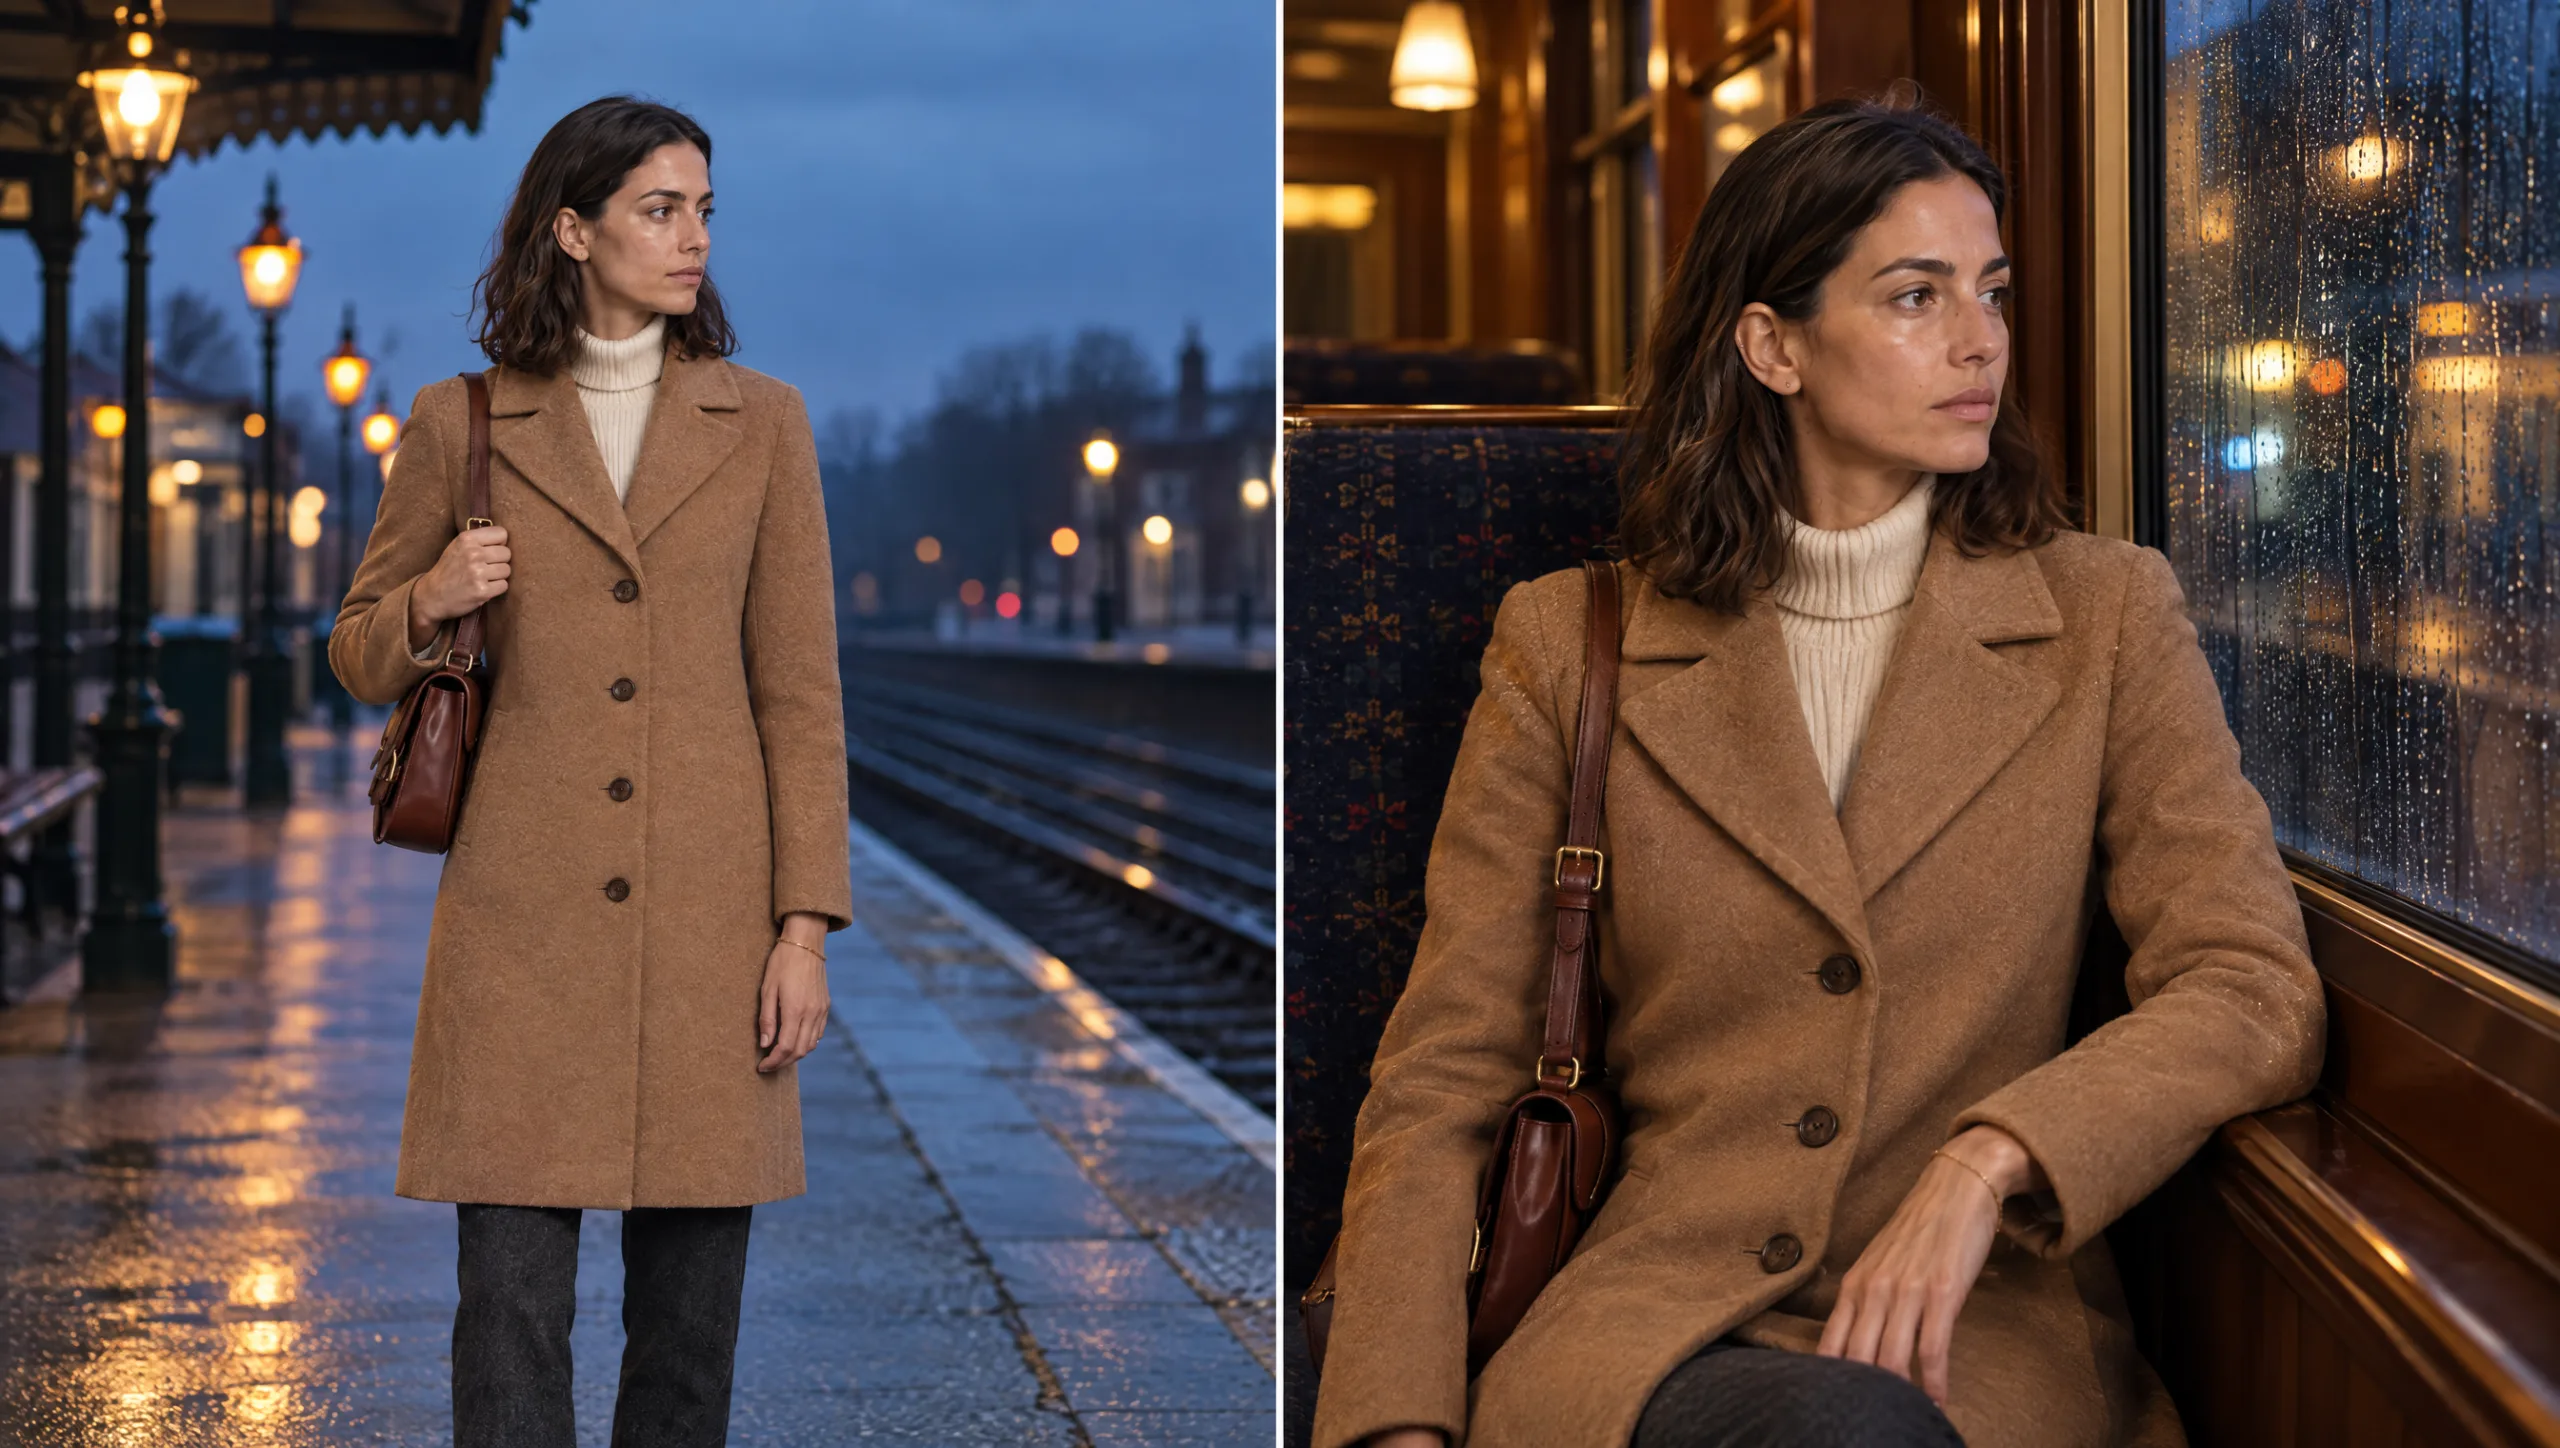
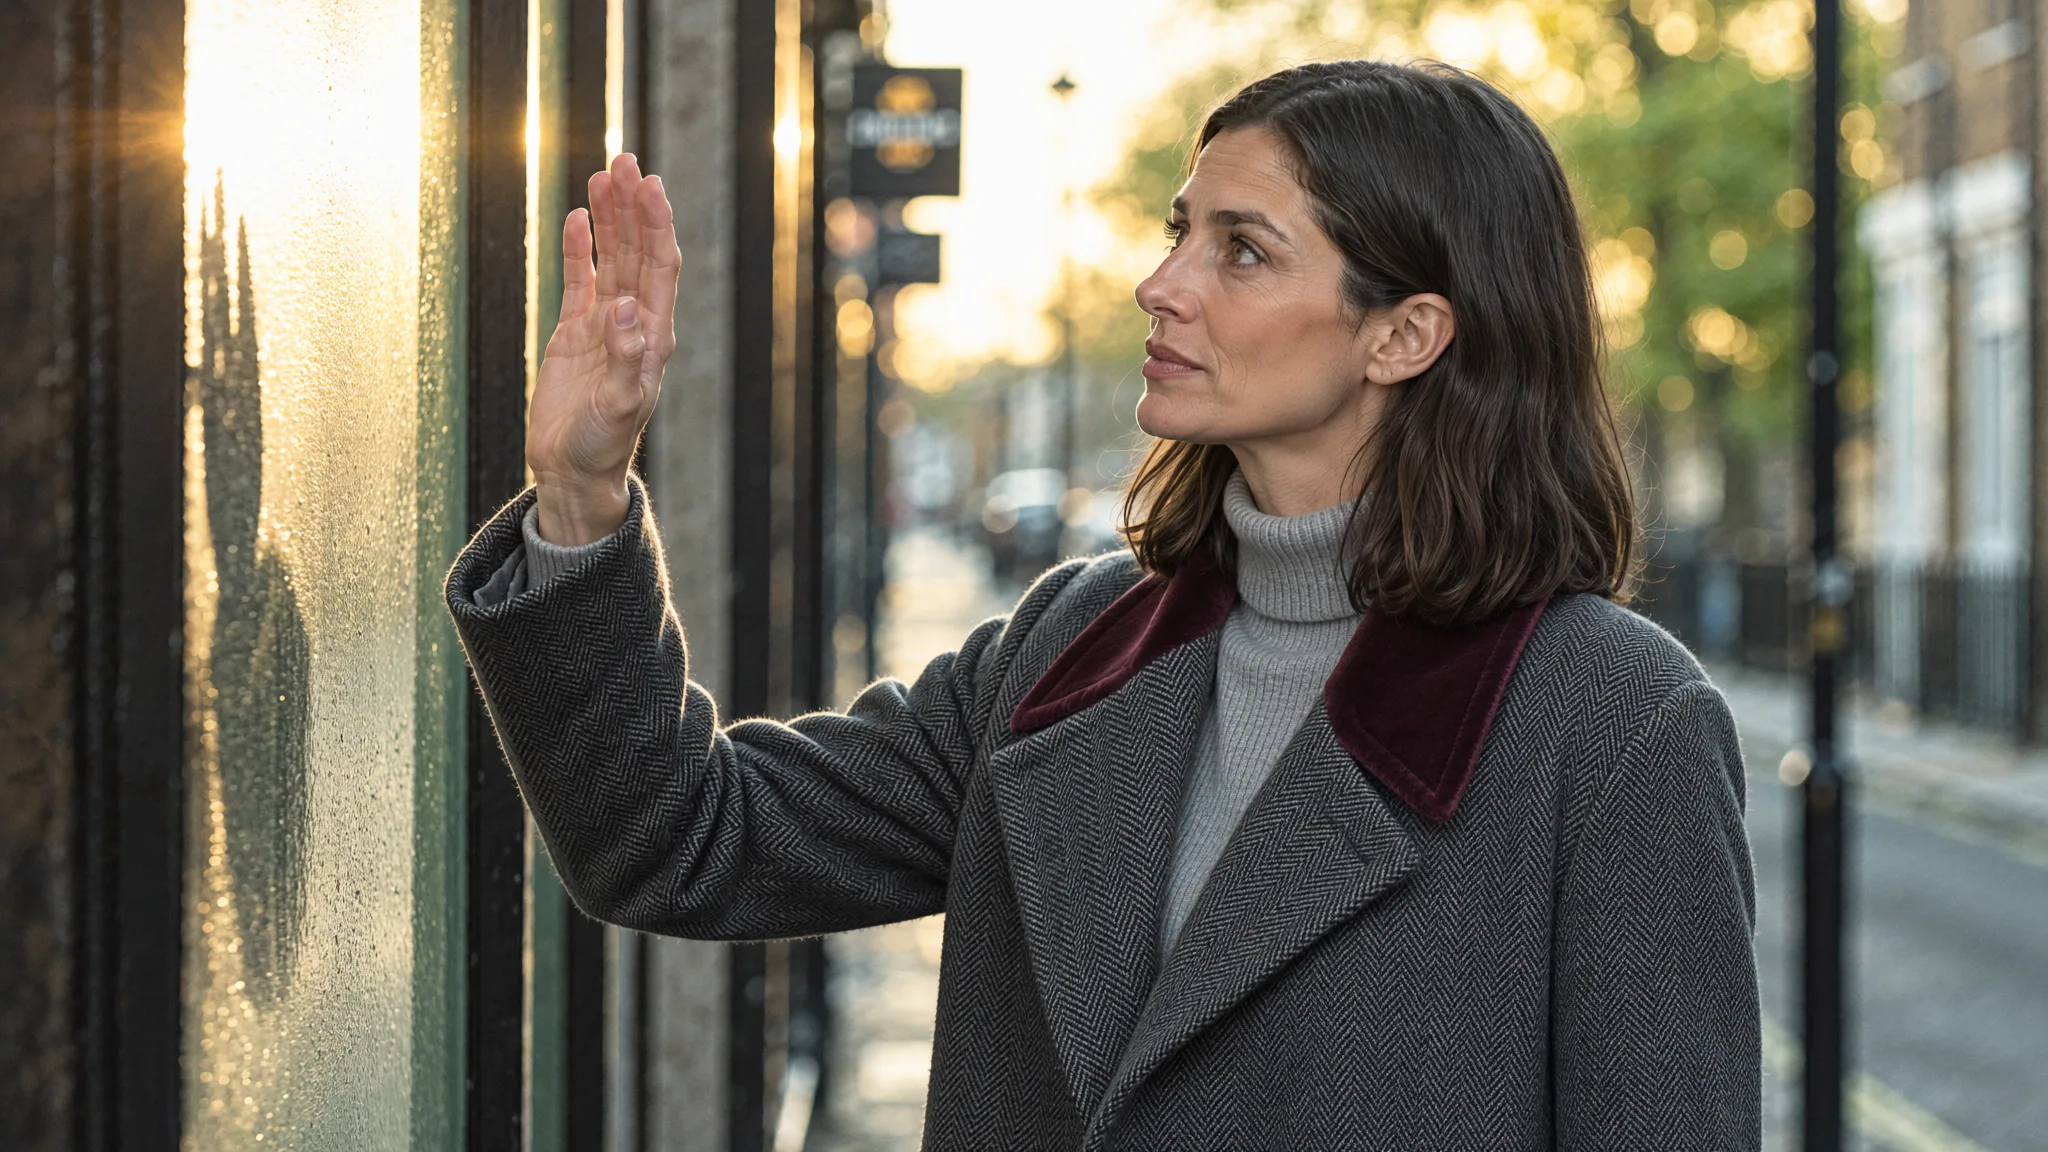
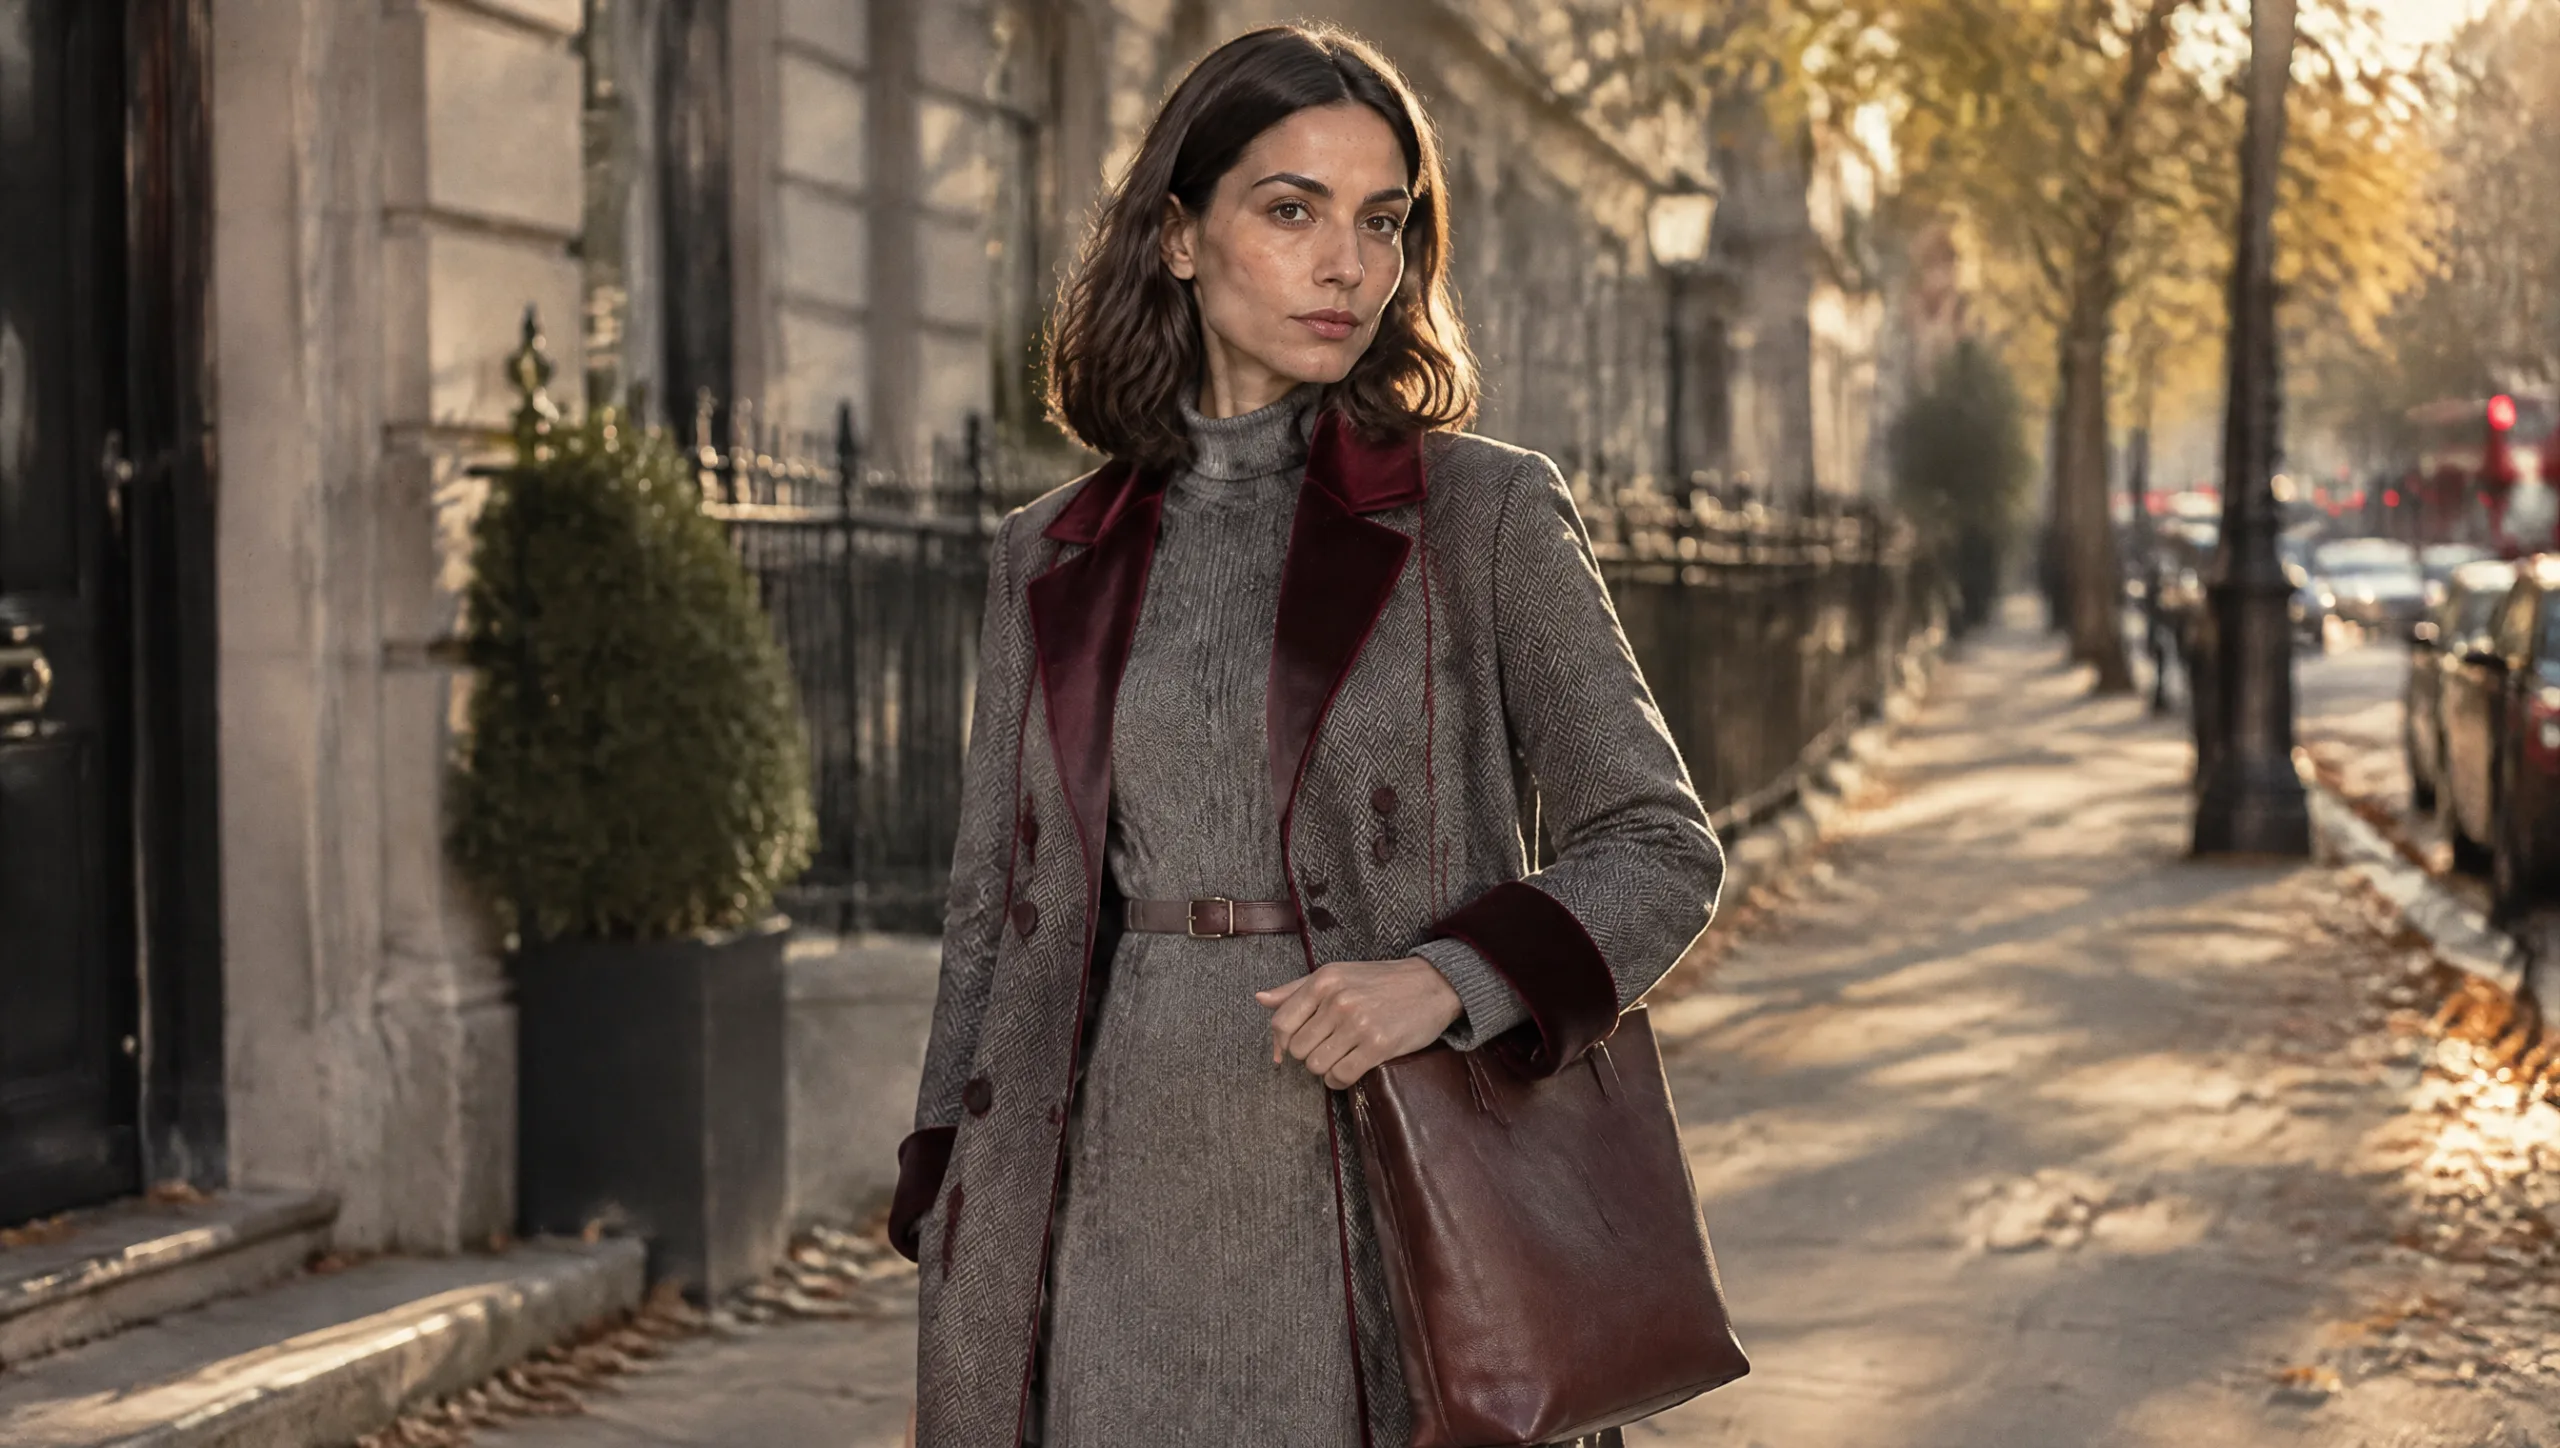
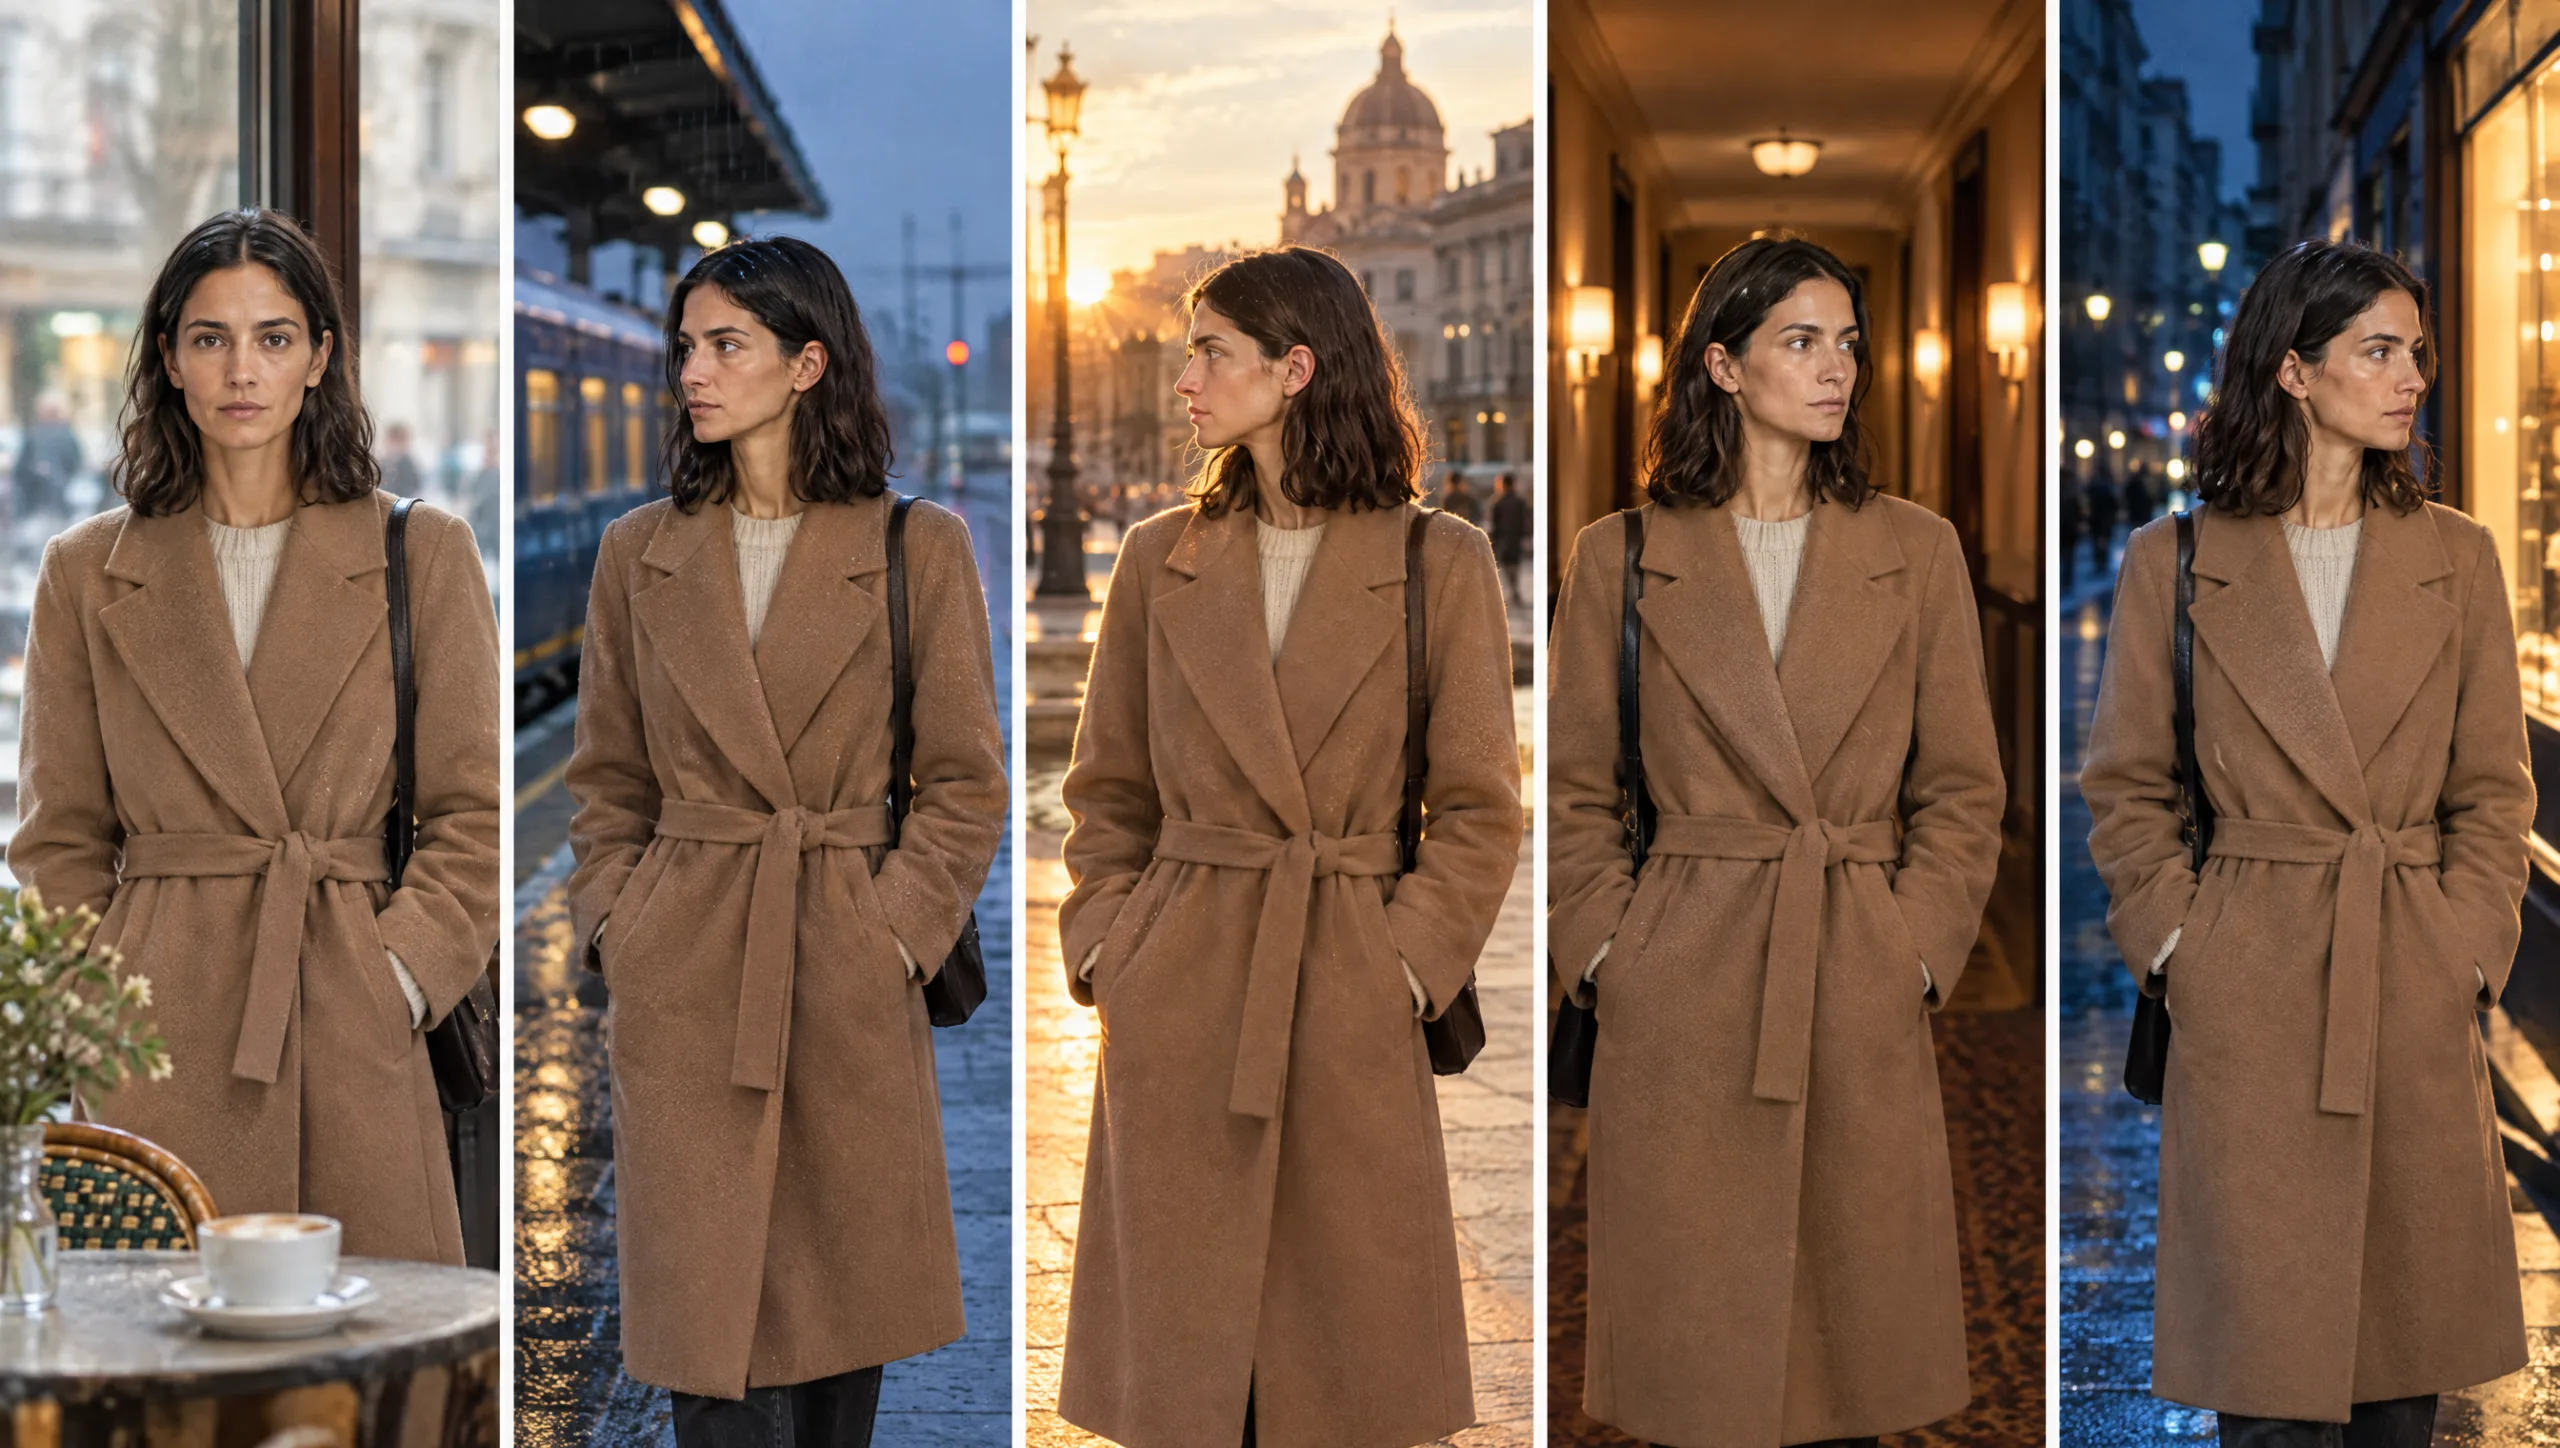
Your character’s face finally holds from shot to shot, but the coat does not. In one scene it is camel wool with four buttons, in the next it is beige with a belt, and by scene five it has grown a hood. AI character wardrobe drift is one of the fastest ways to break a cinematic film, because the audience notices clothes before they notice almost anything else.
This guide gives you the complete workflow I use to stop it, from the first idea of a character to the final approved scene. You will get 14 copyable prompts, one for every step, and the Premium AI Character Sheet: a full template you can fill in once and reuse for every character you ever make. Nothing is held back. Work through it in order and your character will wear the same outfit in scene one and scene twenty.
At a glance
The workflow in 12 steps
- Build the character sheet
- Design an outfit AI can hold
- Write the wardrobe lock
- Generate the identity reference
- Generate the wardrobe reference sheet
- Keep identity and wardrobe separate
- Write every scene with the scene formula
- Hold colour when the light changes
- Animate from an approved key frame
- Run the continuity check
- Correct drift immediately
- Log every approved scene
You will need: an AI assistant such as Claude or ChatGPT for planning, an image generator with reference support such as Higgsfield, and a folder for your character’s reference images.
Why AI Character Wardrobe Drifts Even When the Face Holds
Character consistency tools are built to protect identity. In Higgsfield, Soul ID trains on photos of a character so the face and body stay recognisable across generations. Clothing is a different problem. Every time you generate a new shot, the model reinterprets the outfit from your words, and any gap in the description becomes a decision the model makes for you.
That is why small changes appear first. Button counts shift. Fabric texture changes from wool to cotton. A colour you called “brown” becomes tan in daylight and chocolate at night. Each change is minor on its own, but together they tell the viewer that the scenes were not filmed on the same day.
The fix is a system, not a single prompt. You define the character once, precisely, in a character sheet. You lock the outfit in words and in pictures. Then you build every scene from those locked references and check each one before moving on.
The Gift: The Premium AI Character Sheet
Before the steps, here is the tool that holds the whole method together. The character sheet is the single source of truth for your character. Every prompt in this guide pulls from it, so nothing is ever described twice in two different ways.
Copy the template below into your notes app, Google Docs or Notion. Fill it in once for each character. The completed example after it shows exactly how much detail each section needs.
═══════════════════════════════════════
PREMIUM AI CHARACTER SHEET
DigitalyStyle · Character Continuity System
═══════════════════════════════════════

PROJECT: [Film or series name]
CHARACTER NAME: [Name]
ROLE IN STORY: [Protagonist / supporting / narrator]
SHEET VERSION: [v1] · LAST UPDATED: [Date]

───────────────────────────────────────
1. IDENTITY
───────────────────────────────────────
Age range: [e.g. early thirties]
Background and heritage (as relevant to appearance): [ ]
Personality in three words: [ ]
What the audience should feel when they see this character: [ ]

───────────────────────────────────────
2. FACE (FIXED)
───────────────────────────────────────
Face shape: [ ]
Skin tone and texture: [ ]
Eyes (colour, shape, spacing): [ ]
Eyebrows: [ ]
Nose: [ ]
Lips: [ ]
Distinguishing marks (freckles, scar, mole, and exact position): [ ]
Make-up baseline: [ ]

───────────────────────────────────────
3. HAIR (FIXED)
───────────────────────────────────────
Colour (exact shade): [ ]
Length: [ ]
Texture: [ ]
Style and parting side: [ ]
How it moves: [ ]

───────────────────────────────────────
4. BODY AND POSTURE
───────────────────────────────────────
Height and build: [ ]
Posture: [ ]
How they walk: [ ]
Signature gesture: [ ]

───────────────────────────────────────
5. COLOUR PALETTE
───────────────────────────────────────
Main colour: [name + hex if known]
Second colour: [ ]
Accent colour: [ ]
Colours this character never wears: [ ]

───────────────────────────────────────
6. WARDROBE LOCK: OUTFIT A
───────────────────────────────────────
Outer layer: [colour, fabric, garment, length, cut, open or closed]
Signature detail 1: [ ]
Signature detail 2: [ ]
Signature detail 3: [ ]
Top layer: [ ]
Lower body: [ ]
Footwear: [ ]
Scenes this outfit appears in: [ ]

FULL LOCK PARAGRAPH (copy this into every prompt, never reword):
[ ]

───────────────────────────────────────
7. WARDROBE LOCK: OUTFIT B (OPTIONAL)
───────────────────────────────────────
[Same fields as Outfit A]
Story reason for the change: [ ]

───────────────────────────────────────
8. ACCESSORIES AND PROPS
───────────────────────────────────────
Item: [ ] · Position on body: [left / right / exact place]
Item: [ ] · Position on body: [ ]
Prop the character carries: [ ] · Which hand: [ ]

───────────────────────────────────────
9. EXPRESSION RANGE
───────────────────────────────────────
Resting expression: [ ]
Joy looks like: [ ]
Sadness looks like: [ ]
Tension looks like: [ ]
Expressions this character never makes: [ ]

───────────────────────────────────────
10. VOICE AND MANNER (FOR VOICEOVER)
───────────────────────────────────────
Accent: [ ]
Pace: [ ]
Tone: [ ]
Voice tool and voice name: [e.g. ElevenLabs, voice name]

───────────────────────────────────────
11. NEVER CHANGE
───────────────────────────────────────
[List every detail that must be identical in every shot]

───────────────────────────────────────
12. ALLOWED TO CHANGE
───────────────────────────────────────
[e.g. hair moves in wind, coat may get wet in rain scene 6]

───────────────────────────────────────
13. REFERENCE IMAGES
───────────────────────────────────────
Identity turnaround: [file name]
Expression sheet: [file name]
Wardrobe sheet, Outfit A: [file name]
Detail close-ups: [file name]
Master key frame: [file name]
Identity tool reference (e.g. Soul ID name): [ ]

───────────────────────────────────────
14. SCENE LOG
───────────────────────────────────────
Scene | Shot | Outfit | Location | Lighting | Approved file | Notes
[ ]   | [ ]  | [ ]    | [ ]      | [ ]      | [ ]           | [ ]
═══════════════════════════════════════
Completed example: Mara
This example is a fictional character created to show the level of detail each section needs.
PROJECT: The Last Train North
CHARACTER NAME: Mara
ROLE IN STORY: Protagonist
SHEET VERSION: v1

1. IDENTITY
Age range: early thirties
Personality in three words: composed, watchful, tender
What the audience should feel: that she is holding something back

2. FACE (FIXED)
Face shape: oval with a defined jaw
Skin tone and texture: warm olive, natural texture, visible pores
Eyes: dark brown, almond shaped, slightly deep set
Eyebrows: full, straight, dark brown
Nose: straight, narrow bridge
Lips: medium, defined cupid's bow, natural colour
Distinguishing marks: small mole above the right corner of the upper lip
Make-up baseline: minimal, no visible eyeliner

3. HAIR (FIXED)
Colour: espresso brown
Length: collarbone length
Texture: thick, slight natural wave
Style: centre parting, tucked behind the left ear
How it moves: heavy, swings rather than floats

4. BODY AND POSTURE
Height and build: tall, slim
Posture: upright, shoulders back, still
Signature gesture: turns the bracelet on her left wrist when thinking

5. COLOUR PALETTE
Main: camel #C19A6B
Second: cream #F2EBDD
Accent: charcoal grey #36454F
Never wears: bright red, neon, patterns

6. WARDROBE LOCK: OUTFIT A
Outer layer: camel wool overcoat, knee length, straight cut, always buttoned
Signature detail 1: four dark brown horn buttons
Signature detail 2: wide notched lapels
Signature detail 3: single back vent
Top layer: cream ribbed cotton roll-neck
Lower body: charcoal grey wool trousers, straight leg
Footwear: black leather ankle boots

FULL LOCK PARAGRAPH:
Mara wears a camel wool overcoat, knee length and straight cut, buttoned closed with four dark brown horn buttons, wide notched lapels and a single back vent. Underneath: a cream ribbed cotton roll-neck. Lower body: charcoal grey wool trousers, straight leg. Footwear: black leather ankle boots. Accessories: a thin gold chain bracelet on the left wrist. No other clothing items, no logos, no text.

8. ACCESSORIES AND PROPS
Thin gold chain bracelet · left wrist
Brown leather satchel · right shoulder

11. NEVER CHANGE
Four buttons. Coat always closed. Bracelet on left wrist only. Satchel on right shoulder. Hair tucked behind left ear. Mole above right lip.

12. ALLOWED TO CHANGE
Hair moves in wind on the platform scenes. Coat collar turned up in scene 7.
Step 1: Build the Character Sheet With AI
Start in Claude or ChatGPT, not in your image generator. Planning the character in words first saves you dozens of wasted generations. The prompt below turns a rough idea into a completed character sheet, using the template above.
Prompt 1: Character Sheet Builder
You are a costume designer and continuity supervisor for a cinematic AI short film. Build a complete character sheet for the character below, using every section of the template I paste after this message.

Character idea: [ONE OR TWO SENTENCES ABOUT WHO THEY ARE]
Story and setting: [WHERE AND WHEN THE STORY HAPPENS]
Mood of the film: [E.G. QUIET, MELANCHOLIC, WARM]
Number of scenes: [NUMBER]

Rules:
1. Be exact. Give colour names a designer would use, and a hex code for each palette colour.
2. Design an outfit an AI image model can hold: strong silhouette, no more than three signature details, no patterns, no logos, no text.
3. State left and right for every accessory.
4. State whether outer layers are open or closed.
5. Write the full wardrobe lock paragraph as one block I can copy into every prompt.
6. Fill in the Never Change list with every detail that must stay identical.

[PASTE THE PREMIUM AI CHARACTER SHEET TEMPLATE]
Read the result carefully and edit anything that does not match your vision. This sheet is now the reference for everything that follows.
Step 2: Design an Outfit AI Can Hold
Some outfits are far easier to keep consistent than others, so design for continuity before you design for beauty.
Limit each outfit to three signature details. Strong, simple shapes such as a long coat, a bold scarf or a single block of colour survive from shot to shot. Small prints, checks, lace, logos and any text on clothing drift quickly, because the model redraws them every time. Layers that open and close, such as an unbuttoned jacket, also change easily, so decide whether the coat is open or closed and write it down.
Matte fabrics such as wool and cotton hold better than shiny ones, because reflective fabrics change their colour with every light source.
Prompt 2: Outfit Continuity Stress Test
Review this outfit as a continuity supervisor for AI-generated film. For each item, rate how likely it is to change between AI generations (low, medium, high) and explain why. Then suggest a simplified version of any high-risk item that keeps the same character and mood.

Outfit: [PASTE OUTFIT FROM SECTION 6 OF THE CHARACTER SHEET]
Step 3: Write the Wardrobe Lock
A wardrobe lock is a single, fixed paragraph that describes the outfit. It covers the same things in the same order every time: outer layer, signature details, top, lower body, footwear, accessories, and a closing line that forbids additions.
Be exact with colour. “Rust orange” holds better than “orange”, and “charcoal grey” holds better than “dark”. Name the number of buttons, the length of the coat, and where each item sits on the body.
Prompt 3: Wardrobe Lock Template
WARDROBE LOCK: [CHARACTER NAME] wears a [COLOUR] [FABRIC] [GARMENT], [LENGTH] and [CUT], [OPEN OR CLOSED], with [SIGNATURE DETAIL 1], [SIGNATURE DETAIL 2] and [SIGNATURE DETAIL 3]. Underneath: [COLOUR] [FABRIC] [GARMENT]. Lower body: [COLOUR] [FABRIC] [GARMENT], [FIT]. Footwear: [COLOUR] [MATERIAL] [SHOE TYPE]. Accessories: [ACCESSORY] on the [LEFT OR RIGHT] [BODY PART]. No other clothing items, no logos, no text.Save the finished lock in Section 6 of your character sheet. From this point, you copy it, you never retype it.
Step 4: Generate the Identity Reference
Now give the model a picture of the person. An identity turnaround shows the character from several angles on a plain background, and an expression sheet shows how the face moves without changing who it is.
Generate these in a simple base outfit, such as a plain grey T-shirt, so the identity reference contains no clothing information that could compete with your wardrobe lock.
Prompt 4: Identity Turnaround
Character turnaround sheet of [CHARACTER NAME], [PASTE SECTIONS 2, 3 AND 4 OF THE CHARACTER SHEET]. Wearing a plain mid-grey crew-neck T-shirt. Five views in a row on a plain light grey background: front, three-quarter left, left profile, three-quarter right, back. Neutral expression, arms relaxed. Even soft studio lighting, true-to-life skin texture, photographic realism, consistent proportions in every view.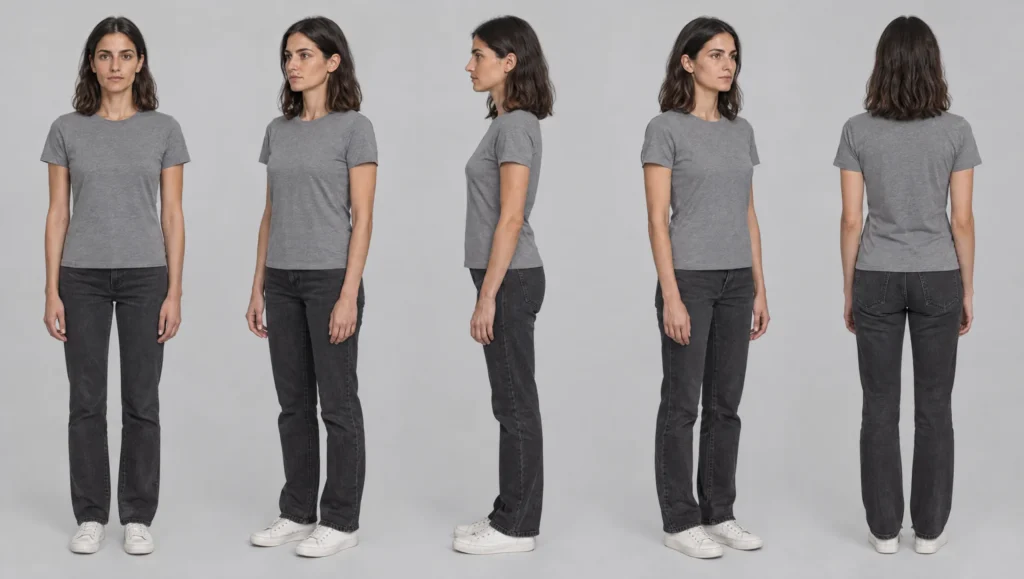
Prompt 5: Expression Sheet
Expression sheet of the same woman shown in the reference image, [CHARACTER NAME], head and shoulders, plain mid-grey crew-neck T-shirt, plain light grey background, even soft studio lighting. Six expressions in a grid: resting, quiet joy, sadness, tension, surprise, determination. Same face, same hair, same proportions in every frame. Expressions are subtle and cinematic, not exaggerated.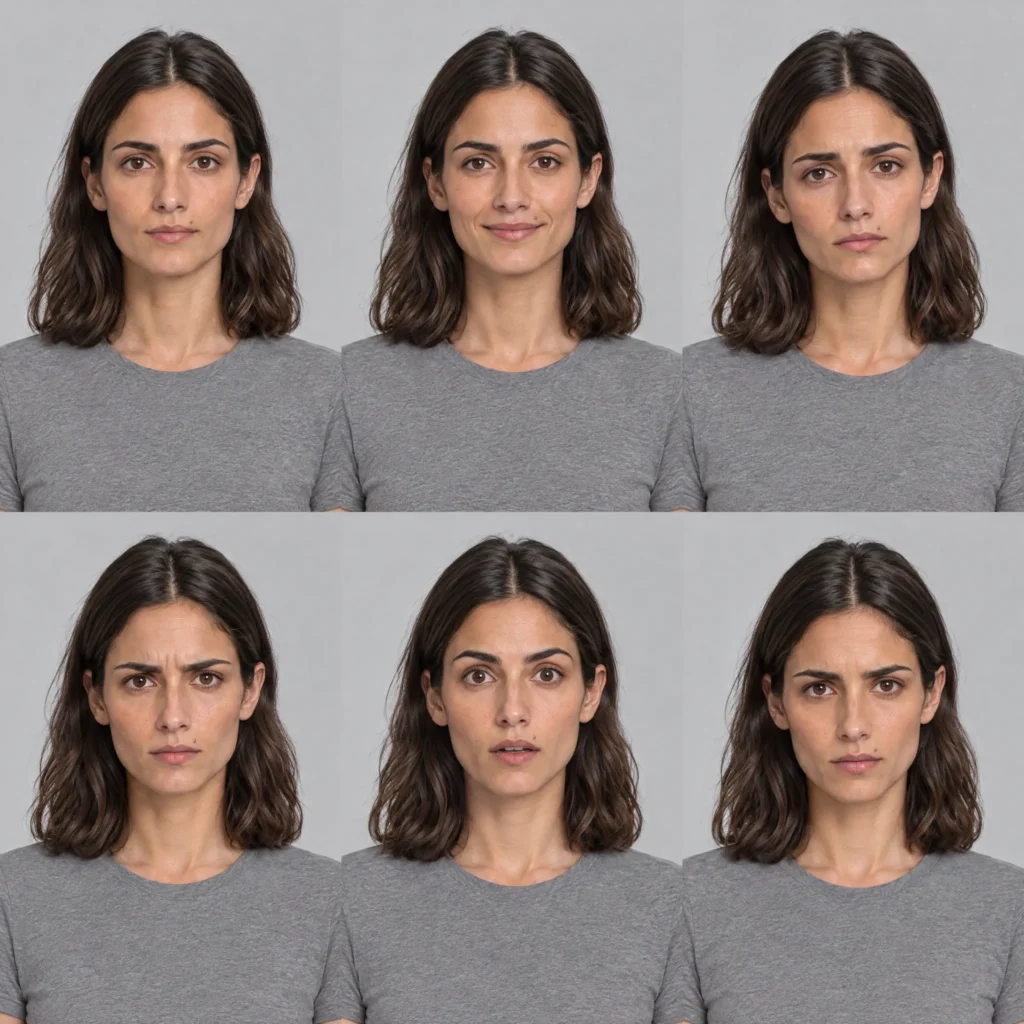
If you use Higgsfield, these approved images are the clean, consistent references to use when you train your Soul ID.
Step 5: Generate the Wardrobe Reference Sheet
A written lock gives the model the words. A wardrobe reference sheet gives it the picture. Generate the full outfit on a plain background, from the front, the side and the back, with close-ups of every signature detail.
Prompt 6: Wardrobe Reference Sheet
Wardrobe reference sheet on a plain light grey background, even soft studio lighting, true-to-colour fashion photography. The full outfit shown on a faceless tailor's mannequin in three views: front, side and back. Below, three close-up detail shots of [SIGNATURE DETAIL 1], [SIGNATURE DETAIL 2] and [SIGNATURE DETAIL 3]. [PASTE WARDROBE LOCK]. Clean, accurate, no styling additions.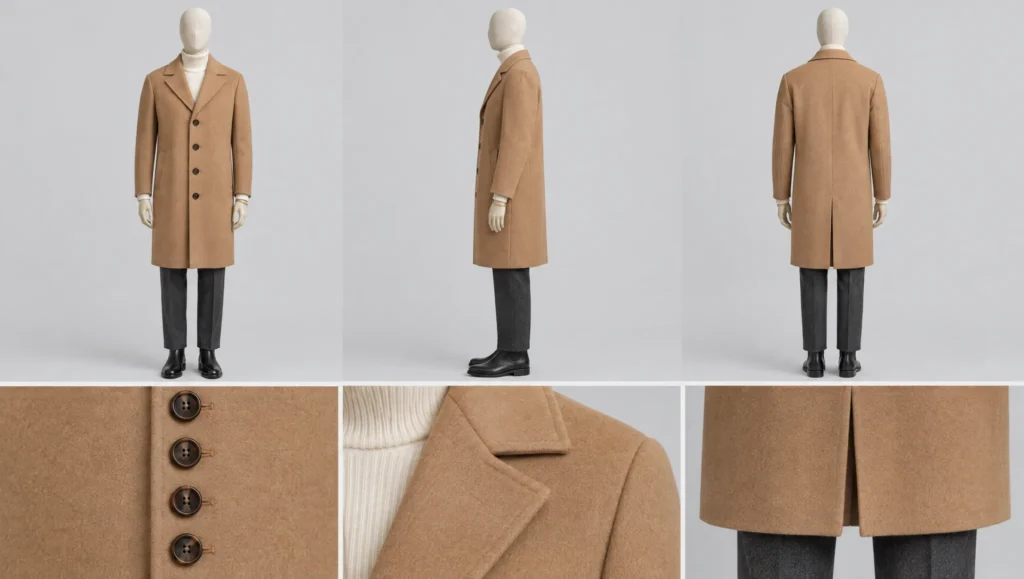
Prompt 7: Outfit on Character
Full-length photograph of [CHARACTER NAME] from the reference image, standing facing the camera, plain light grey studio background, even soft lighting. [PASTE WARDROBE LOCK]. Use the wardrobe reference sheet for every garment detail. Neutral expression, arms relaxed, true-to-colour, photographic realism.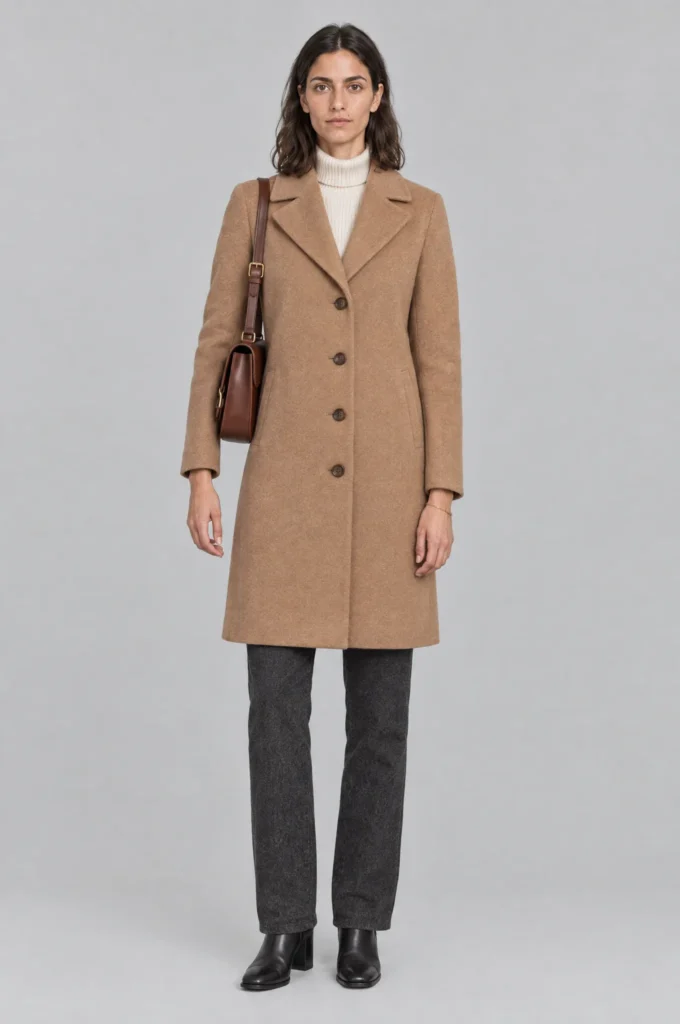
Approve both images before you generate a single scene. If the buttons are wrong here, they will be wrong everywhere. Save the approved files and record their names in Section 13 of your sheet.
Step 6: Keep Identity and Wardrobe Separate
Let each reference do one job. Your identity tool, such as a trained Soul ID, holds the face and body. Your wardrobe lock and wardrobe sheet hold the clothes.
When the two are mixed, for example when identity is trained on photos where the character wears different outfits, the model can learn the face and a confused idea of the clothing at the same time. That is why the identity references in Step 4 use a plain grey T-shirt. Clean identity plus a separate wardrobe reference gives you control over both.
Step 7: Write Every Scene With the Scene Formula
Every scene prompt follows the same order, so the wardrobe lock always sits in the same place and is never edited by accident.
The scene formula: shot type and camera, then character and action, then the wardrobe lock unchanged, then location, then lighting, then mood.
Prompt 8: Scene Prompt
[SHOT TYPE, E.G. MEDIUM SHOT], [CAMERA, E.G. 35MM LENS, EYE LEVEL]. [CHARACTER NAME] from the reference image [ACTION, E.G. WAITS ON THE PLATFORM, LOOKING DOWN THE TRACK]. [PASTE WARDROBE LOCK]. Location: [LOCATION]. Lighting: [LIGHTING]. Mood: [MOOD]. Cinematic, photographic realism, consistent with the wardrobe reference sheet.Example: Medium shot, 35mm lens, eye level. Mara from the reference image waits on the platform, looking down the track. Mara wears a camel wool overcoat, knee length and straight cut, buttoned closed with four dark brown horn buttons… (full lock pasted). Location: an empty Victorian railway platform at dusk. Lighting: cool blue dusk with warm sodium lamps behind her. Mood: quiet, expectant.
Step 8: Hold Colour When the Light Changes
Colour drift often happens because the lighting changes, not the outfit. A camel coat under blue moonlight is not the same colour as under golden hour sun, and the model sometimes “corrects” the coat instead of lighting it.
Add a colour anchor to any scene with strong or coloured lighting. It tells the model that the garment colour is fixed and only the light on it changes.
Prompt 9: Colour Anchor Line
Colour anchor: the [GARMENT] is [EXACT COLOUR] in neutral light. In this scene it is lit by [LIGHTING], so it reads [WARMER / COOLER / DARKER] but remains recognisably the same [EXACT COLOUR] garment. Do not change the garment colour, only the light falling on it.Add this line after the wardrobe lock in your scene prompt for night scenes, coloured neon, firelight, golden hour and any strong colour grade.
Step 9: Animate From an Approved Key Frame
Once your first scene looks right, treat that still as the master key frame. Use it as the image reference for the next shots instead of starting from text alone. For video, animate approved stills rather than generating straight from a prompt. Each new shot then inherits the outfit from a picture you have already checked.
If your tool supports generating several frames from shared references in one batch, such as Higgsfield Popcorn, use it for shots that happen in the same moment.
Movement is where clothing changes most, so the motion prompt must protect the outfit too.
Prompt 10: Image-to-Video Motion Prompt
Animate this image. [CHARACTER NAME] [ACTION, E.G. TURNS HER HEAD SLOWLY TOWARDS THE CAMERA]. Camera: [MOVEMENT, E.G. SLOW PUSH-IN]. The clothing stays exactly as in the image: [LIST THE NEVER CHANGE DETAILS, E.G. COAT BUTTONED, FOUR BUTTONS, BRACELET ON LEFT WRIST]. Fabric moves naturally for [FABRIC, E.G. HEAVY WOOL]: it sways slightly but does not change shape, length or colour. No new items appear.Step 10: Run the Continuity Check
Before you move to the next scene, compare the new frame with your wardrobe reference sheet and check five things.
Colour: is each item the same shade, allowing for the scene’s lighting?
Shape: is the length, cut and fit the same?
Details: are the buttons, lapels and signature details all present and correct?
Accessories: is each one there, on the same side of the body?
Additions: has anything appeared that is not in the lock?
For a second pair of eyes, upload the new frame and your wardrobe reference sheet to Claude or ChatGPT and run the audit prompt.
Prompt 11: AI Continuity Audit
You are a film continuity supervisor. Image 1 is the approved wardrobe reference. Image 2 is a new scene. Compare the clothing and accessories only, not the face, location or lighting.

For each item in this wardrobe lock, report: MATCH, CHANGED or MISSING, with a one-line description of any change.
[PASTE WARDROBE LOCK]

Then list anything in Image 2 that does not appear in the lock. Finally, write a single correction instruction I can paste into my image editor to fix every problem you found.
If any answer is no, fix it now. Drift compounds, because every new scene is built from the last one.
Step 11: Correct AI Character Wardrobe Drift Immediately
When one detail goes wrong, do not regenerate the whole scene. Correct the frame and keep everything else the same.
Prompt 12: Wardrobe Correction
Keep the scene, pose, lighting, framing, expression and face exactly as they are. Correct only the clothing to match this description: [PASTE WARDROBE LOCK]. Specifically fix: [WHAT IS WRONG, E.G. "THE COAT HAS FIVE BUTTONS, IT MUST HAVE FOUR DARK BROWN HORN BUTTONS"]. Do not add, remove or restyle any other item.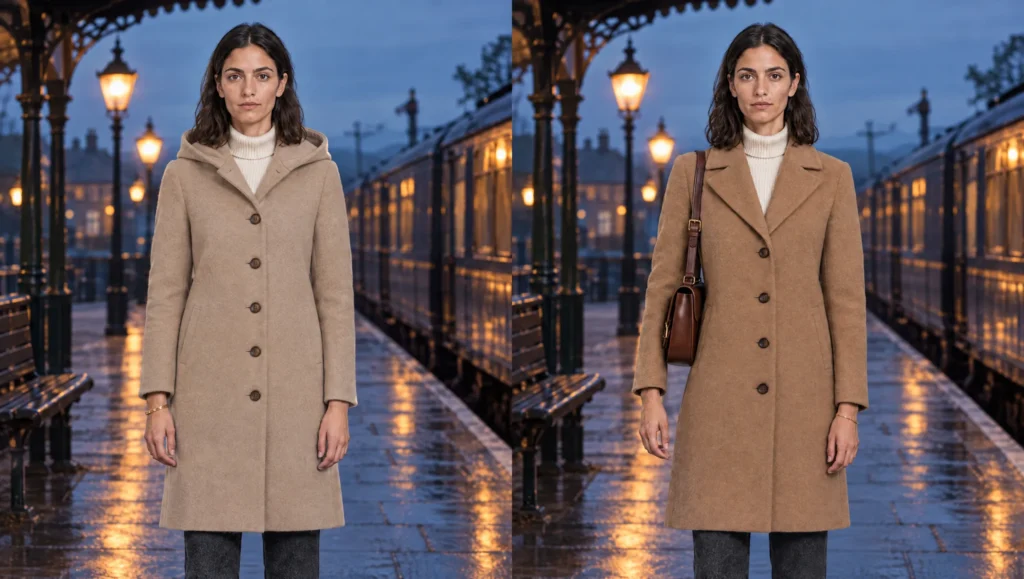
Name the exact error. A correction that says “fix the coat” invites the model to redesign the coat. Fix one or two problems per correction, then check again.
Prompt 13: Accessory Correction
Keep everything in this image exactly as it is. The only change: [ACCESSORY] must be on the [LEFT OR RIGHT] [BODY PART], not the [WRONG SIDE OR MISSING]. Match the accessory exactly to the reference: [DESCRIPTION FROM SECTION 8 OF THE CHARACTER SHEET].Step 12: Log Every Approved Scene
The last step is the one most people skip, and it is the one that protects you on scene twenty. Every time you approve a shot, record it in Section 14 of your character sheet: the scene, the shot, the outfit, the location, the lighting and the approved file name.
When you return to the project a week later, or when you need a reshoot, the log tells you exactly which frame to use as your reference. It also shows you at a glance which outfit the character should be wearing in each scene, which matters as soon as your story has more than one costume.
Bonus: Changing the Outfit on Purpose
Stories need costume changes. A character may change for a wedding, get caught in rain or appear in a flashback. The method stays the same: every outfit gets its own lock.
Write Outfit B in Section 7 of the sheet, generate a separate wardrobe reference for it, and record in the scene log exactly which scenes use which outfit. Never let two outfits share a prompt.
Prompt 14: New Outfit, Same Character
Full-length photograph of [CHARACTER NAME] from the reference image. Keep the face, hair, body, proportions and [ACCESSORIES THAT STAY] exactly the same. Change only the clothing to: [PASTE OUTFIT B WARDROBE LOCK]. Plain light grey studio background, even soft lighting, true-to-colour, photographic realism.Common mistake
Rewording the outfit in every prompt. Writing “a camel coat” in one scene, “a tan overcoat” in the next and “a long beige jacket” after that gives the model three different outfits to draw. The fix is to write the wardrobe lock once, store it in the character sheet and paste it, unchanged, into every prompt.
Quick version
Fill in the character sheet with Prompt 1. Simplify the outfit to three signature details. Write one wardrobe lock and paste it, unchanged, into every prompt. Generate an identity reference in a plain T-shirt and a separate wardrobe reference sheet. Build scenes with the scene formula, add a colour anchor for strong lighting, and animate only approved stills. Check five details after every shot, correct drift immediately and log every approved frame.
Your move
Copy the Premium AI Character Sheet into your notes and run Prompt 1 for the main character in your current project. Then generate the wardrobe reference sheet with Prompt 6 before you make your next scene.
Keep the prompts close. All 14 prompts from this guide are also in the free Prompt Library under Wardrobe, Character and Continuity, so you can copy them straight into your next session.
Download the Premium AI Character Sheet. Get the character sheet as a printable PDF and an editable Google Doc, with all 14 prompts included, sent straight to your inbox.
Related articles
- how to create a consistent AI character from scratch
- how to build an AI character sheet in Higgsfield
- how to fix faces that change between AI shots
Frequently Asked Questions
Can Soul ID keep my character’s clothes consistent?
Soul ID is designed to keep the face and body recognisable. Clothing still needs its own fixed description and reference image, which is what the wardrobe lock and wardrobe sheet provide.
How many signature details should an outfit have?
No more than three. Every extra detail is another thing the model can change between shots.
Why does my character’s outfit change colour at night?
The model sometimes changes the garment instead of the light. Add the colour anchor line from Step 8 to any scene with strong or coloured lighting.
Does this method work outside Higgsfield?
Yes. The character sheet, wardrobe lock, scene formula and continuity check work with any image or video generator that accepts text and reference images.



Read the Comments +