
PROMPTS AND WORKFLOWS · HOW-TO GUIDE
Somewhere in your chat history is the prompt that finally held the face. You cannot find it, so you rewrite it from memory, and the face moves again. That is the cost of treating prompts as throwaway text. An AI prompt library fixes it, but only if you organise it the way you make a film rather than the way a chat saves itself. This guide shows you how to build one. It is organised by purpose instead of by project, with an entry format that keeps the result next to the words. It also has a naming rule you will still understand in a year, and a weekly habit that stops it going stale. Because a good library compounds, every film you make with it makes the next one faster.
At a glance
- Organise by purpose, not by project: eleven purposes cover every prompt you will write.
- Give every entry the same six fields, so the result lives next to the text.
- Name entries so you can find them by purpose, tool and version.
- Save only prompts that produced an approved result.
- Keep a weekly habit of filing, pruning and versioning.
- Use the four prompts below to build and maintain the library.
You will need: a notes app or document that supports headings and search, your character sheet and scene log, and twenty minutes a week.
Why Projects Are the Wrong Folder
The natural way to save prompts is by project, because that is where you were when you wrote them. However, a project folder answers the question “what did I do on that film?”. It does not answer the question you actually ask, which is “how do I get a close-up to hold in cool light?”. So the prompt you need is always in a different project’s folder, under a name that meant something at the time.
A library organised by purpose answers the real question. When you need a lighting line, you open Lighting. When a face has drifted, you open Correction. The entry records the project, but the project is not the drawer.
Step 1: The Eleven Purposes
Every prompt in AI filmmaking does one of eleven jobs. These are the drawers of the library, and in my own system they are the same eleven that organise my free prompt library.
Story. Spines, beats, outlines, the change.
Script. Shot lists, coverage, durations, voiceover.
Character. Descriptions, turnarounds, identity sets, two-character scenes.
Wardrobe. Outfit locks, reference sheets, states, outfit changes.
Location. Location lines, establishing shots, set details.
Camera. Shot sizes, lenses, angles, moves, the scene formula.
Lighting. Lighting lines, colour anchors, the lighting library.
Voice. Voiceover text, voice direction, delivery notes.
Editing. Cut lists, rhythm, music cues, title cards.
Continuity. Audits, scene log entries, pre-shoot checks.
Correction. Face, outfit, lighting and blend corrections.
If a prompt does two jobs, file it under the one you would search for first, and then cross-reference the other in the entry. Furthermore, resist adding a twelfth drawer for at least a month; almost everything fits.

Step 2: The Six-Field Entry
A prompt without its result is a guess. Therefore, every entry in the library has the same six fields, and the result is the most important one.
Name. Purpose, what it does, tool, version. For example: Lighting, window interior, Higgsfield, v2.
Prompt. The exact text, with the fill-in slots in square brackets.
Needs. What to attach or select before running it: a Soul ID, an outfit sheet, an approved previous frame.
Result. The file name or a thumbnail of the approved frame it produced, and the date.
Notes. What to change for a different scene, what it does badly, what the previous version got wrong.
Source. The project it came from, and the scene log row.
Prompt 1: Library Entry Writer (run in Claude or ChatGPT after a prompt produces an approved frame)
Turn this prompt and its context into a prompt library entry with six fields: Name (Purpose, what it does, tool, version), Prompt (the exact text with fill-in slots in square brackets, replacing anything project-specific such as names, locks and lines with a slot), Needs (what to attach or select before running it), Result (file name and date), Notes (what to change for another scene and what it does badly), Source (project and scene log row). Keep the Prompt field word for word apart from the slots.

Prompt as used: [PASTE]
Purpose: [ONE OF THE ELEVEN]
Tool: [NAME]
Attached or selected: [LIST]
Approved frame: [FILE NAME, DATE]
Project and scene: [NAME, ROW]
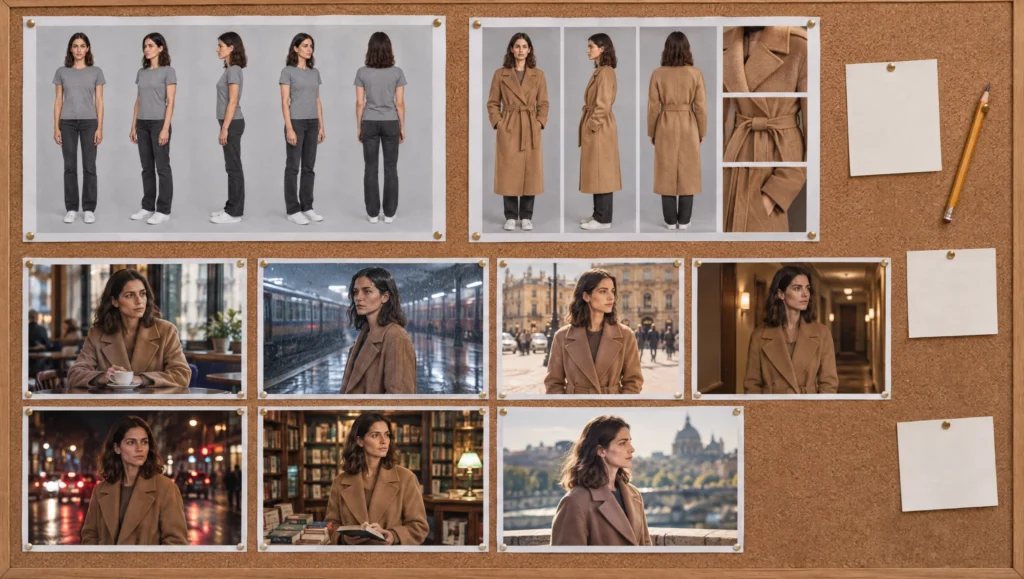
The slots are the point. A prompt saved with Mara’s name and camel coat in it is a record; a prompt saved with [CHARACTER NAME] and [OUTFIT LOCK] in it is a tool.
Step 3: The Naming Rule
Names do two jobs: they sort, and they search. So every name starts with the purpose, then what the prompt does in three or four plain words, then the tool, then a version number. Lighting, window interior, Higgsfield, v2. Correction, face only left side, Higgsfield, v1. Camera, tracking move alongside, any, v3.
Versions matter more than they seem. When a prompt stops working after a tool update, you rewrite it. The old version then stays in the entry’s notes with the date it stopped working. In this way the library carries its own history.
Step 4: Save Only What Worked
The library is not a diary. Consequently, a prompt earns its place only when it produced a frame you approved, and the approved frame goes in the Result field. Do not save prompts that failed, with one exception. A failure that taught you something goes into the Notes of the prompt that eventually worked, as one line.
This rule keeps the library small and trustworthy. A hundred entries you can rely on beat a thousand you have to test.
Step 5: Build It From Your Scene Log
If you have been keeping a scene log, you already have the raw material. Every approved row contains a prompt that worked and the file it produced. Work back through the log and file each one with Prompt 1. Afterwards, the library and the log point at each other: the log row names the entry, and the entry’s Source field names the row.
Prompt 2: Scene Log to Library (run in Claude or ChatGPT, paste a page of your scene log)
Here are rows from my scene log, each with the prompt that produced an approved frame. For each row, create a prompt library entry with the six fields: Name, Prompt (with project-specific names, locks and lines replaced by square-bracket slots), Needs, Result, Notes, Source. Assign each to one of these purposes: Story, Script, Character, Wardrobe, Location, Camera, Lighting, Voice, Editing, Continuity, Correction. Where two rows used the same prompt with different slots, merge them into one entry and list both results. Group the output by purpose.

Scene log rows: [PASTE]
Step 6: The Weekly Habit
A library stays useful only if it is used and pruned. Twenty minutes a week is enough. First, file any new prompt that produced an approved frame since last week. Then, prune: if two entries do the same job, keep the better one and fold the other’s notes in. Next, version: if a tool update changed what a prompt does, rewrite it, bump the version, and note the date. Finally, read one purpose you have not opened lately, because that is where the prompt you have forgotten is waiting.
Prompt 3: Library Audit (run in Claude or ChatGPT, paste one purpose section)
Audit this section of my prompt library. Answer in one line each: 1. Which entries do the same job and should be merged, and which one should survive? 2. Which entries have no Result field filled in and should be removed or tested? 3. Which entries still contain project-specific names or lines that should be slots? 4. Which entries have not been versioned in more than three months? Then list the actions in order.

Library section: [PASTE]
Step 7: Share the Library With Your Tools
A library in a notes app is a start. It becomes faster when the entries are where you prompt. In practice that means a few things. Keep the eleven purposes as headings in a single document so search finds them. Pin the purposes you use most, usually Camera, Lighting and Correction. And when you begin a new project, copy the entries you expect to need into the project’s scene log as a starting set. That way the first prompts of the film are already proven.
Prompt 4: Project Starter Set (run in Claude or ChatGPT)
From my prompt library, select a starter set for a new project with the brief below: the five to eight entries most likely to be needed, drawn from at least four purposes, with the slots filled in from the character sheet and scene lines I give you. Output each as a ready-to-run prompt labelled with its library name, followed by what to attach.

Project brief: [ONE PARAGRAPH]
Character sheet: [PASTE DESCRIPTION AND OUTFIT LOCKS]
Location and lighting lines for scene 1: [PASTE]
Library: [PASTE OR ATTACH]
Where the Free Library Fits
My own prompt library follows exactly this structure, and the free version on this site is organised by the same eleven purposes. Every guide on this blog ends with its prompts filed there. So if you are starting from nothing, begin by copying the entries you need into your own library. Then replace them with your own versions as your results come in. The library is yours when the Result fields are yours.
Common mistake
Saving every prompt. It feels thorough to keep everything. In practice the library fills with prompts that did not work, and they bury the one that did. A prompt earns its place by producing an approved frame, and the frame goes in the entry. Everything else is chat history, and chat history is where prompts disappear.
Quick version
Organise by the eleven purposes, not by project. Give every entry six fields: name, prompt with slots, needs, result, notes, source. Name entries purpose, job, tool, version. Save only prompts that produced an approved frame, and keep the frame next to the text. Build the first version from your scene log, then spend twenty minutes a week filing, pruning and versioning.
Your move
Open your last scene log and find the three prompts that produced frames you were proudest of. Run Prompt 1 on each. That is your library, as of today, and it already has three entries you can trust.
Get the prompts. All four prompts from this guide, and every prompt from every article on this blog, are in the free Prompt Library organised by the same eleven purposes.
Related articles
- the AI character continuity checklist
- how to turn a script into a shot list for AI video
- how to write AI scene prompts with the scene formula
- how to create a consistent AI character from scratch
Paid next step: The Prompt Vault, the complete library: every prompt from every guide, organised by the eleven purposes, with the six-field entries filled in and the results attached.
Frequently Asked Questions
How should I organise an AI prompt library?
By purpose, not by project. Eleven purposes cover AI filmmaking: story, script, character, wardrobe, location, camera, lighting, voice, editing, continuity and correction. Record the project on the entry instead.
What should a prompt library entry contain?
Six fields. A name built from purpose, job, tool and version; the prompt with slots; what it needs attached; the approved result; notes; and the source project and scene log row.
Should I save prompts that did not work?
No. Save only prompts that produced an approved frame. A useful failure becomes one line in the notes of the prompt that eventually worked.
Which app should I use?
Any that supports headings and search. The structure matters more than the tool, and a single document with eleven headings is enough to start.




Read the Comments +